
Power points are great for lectures, but for classrooms with projectors, nothing beats a word doc for interacting with students’ in-the-moment learning. The beauty of being able to work with a word doc on a screen is that you can be more responsive to what comes from the students. Lessons can build, grow, morph and change.
We use word docs in the writing and grammar classroom to investigate the construction of sentences and explore options. The highlighting feature is brilliant for showing grammar and vocabulary patterns because it can immediately target structures we want students to notice. At later stages it facilitates an investigation of student-generated examples.
The following is a how to for working with three basic sentence patterns that figure prominantly in TRIO and Effective Academic Writing but can appear in any writing or grammar course: simple, compound and complex.
Using real models
When working with example sentences, we like to draw from texts that are graded for intermediate level language learners. The beauty of graded readings is that they reflect meaningful connected speech while modeling sentence types that students can reasonably expected to produce. Graded texts also tend to avoid figurative language and high level vocabulary, which reduces the cognitive demands. The following examples are taken from a reading passage about the women whose stories were featured in the film Hidden Figures. You can download it here.
Setting up a word doc
For best viewing, it’s a good idea to make a few changes to the basic word doc:
Font: Use Calibri, Helvetica or another sans-serif font as these are easier to read on screen.
Size: Use at least a 14 point font, but enlarge the screen to around 150 – 200%. This enables lines of text to look natural but is big enough for students to see clearly.
Spacing: We select 1.15 to make reading comfortable.
Color: When highlighting, we try to be consistent with color. So throughout the semester, we make all subjects yellow and all verbs green, using other colors for other features of the language that may come up. We like yellow, green and blue because they produce less glare.
Eliciting and discussing
Instead of presenting the sentences with the highlighting already done, we recommend eliciting a language feature, e.g., What is the verb? and inviting students to identify it. Then we highlight the verb in green. Once it is highlighted, we can move to observations and questions. Depending on what they say, we might move chunks around or type up new examples. For example, there might be questions about comma usage.
A sequence for subject/verb awareness in different sentence types
Students at all levels can benefit from discussions of subject/verb conventions. At a fairly basic level, it is possible to introduce the concepts of one clause sentences by eliciting and highlighting the subjects and verbs. From a foundation in the one-clause sentence, it is then possible to show how clauses work together in compound and complex patterns.
The first example below shows how simple sentences may have multiple nouns or verbs, but the yelow is always on one side and the green is always on the other. Here is an example of a document after the highlighting has been elicited and discussed.

Next, students can be introduced to two-clause sentences. In the example below, notice that the yellow/green + yellow/green pattern contrasts with the yellow/green pattern of simple sentences.

The third pattern introduces compound sentences. Note: If these patterns seem very basic, consider that the sentences you choose to use for eliciting can display more complicated features of the subject/verb relationship such as the distracting role of prepositional phrases in agreement (E.g., This woman with the help of her colleagues was able to do great things.)

Once students are aware of the pattern, ease them into practice by having them identify the patterns in new sentences. Students can discuss in pairs and then share with the class as you highlight and discuss features. Notice the red comma which came up as students reviewed the rule fo dependent clauses.

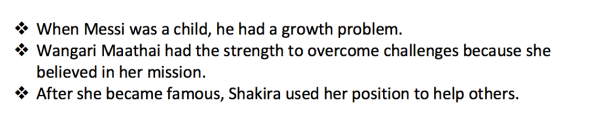
Students can then be instructed to go through a text and identify additional examples of the patterns to raise their awareness of sentence types and writers’ strategies. This activity can also involve identifying the incidence of each pattern in the text. The following paragraph has mostly simple sentences, one complex, two compound, and one complex-compound.

The example above can lead to a discussion on the value and power of simple sentences in communicating meaning, especially when used in combination with other types of sentences. Students can be encouraged to make deliberate decisions about the type of sentence they want to use. For example, we might discuss the writing strategy of introducing an idea with a direct simple statement followed by an explanation in the form of a complex or compound sentence.
Eliciting student-generated sentences
As a last stage, it is always a good idea to have students generate their own sentences around a writing prompt. This can be done as a pre-writing activity to help set some language in their minds before they write.
Simply instruct students to try some different sentences about their topic. As the write, circulate and give support. Then elicit salient examples to the screen, identify options and give additional explanation as needed. Here are a couple of examples.
This example lesson focuses on common sentence patterns, but the technique of color-coding for language features can be applied to other structures such as infinitives or gerund patterns, participle adjectives, embedded clauses and anything else that is worth a lesson.
As a final note, annecdotal evidence suggests that when patterns are reviewed in this way, before writing, rather than after the error has been made, the result can make life easier for the teacher and happier for the writer.

I do something similar with my students. I highlight grammar errors according to the type of error they make. It makes it really easy to look at past homework and see their progress. My student seem to like this system as well.
yellow is for grammar errors or mixed up word order
blue is for vocabulary problems
green is for singular/plural or article misuse
pink is for illogical or incoherent phrases
red is for punctuation or spelling or typo
Grey is for pronunciation
LikeLike
Cool! There’s so much you can do with color! And I think it provides a very effective cognitive hook for recognizing and remembering patterns.
LikeLike